RunOnceEx example
This post is a two-fer:
- First, it shows how one might use the RunOnceEx registry keys to install software on boot.
- Second, it shows how (not) to do subroutines in a batch script.
RunOnceEx
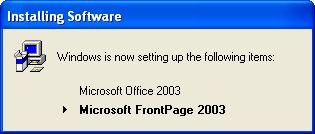
RunOnceEx is similar to the RunOnce key: it allows you to launch a program during boot, and deletes itself when done. However, unlike RunOnce, RunOnceEx shows a nice friendly window while it runs:
The RunOnceEx key contains a number of subkeys; each has its own title and a set of commands to launch.
reg add "HKLM\SOFTWARE\Microsoft\Windows\CurrentVersion\RunOnceEx" /v TITLE /d "Installing Software" /f

reg add "HKLM\SOFTWARE\Microsoft\Windows\CurrentVersion\RunOnceEx\0001" /ve /d "Microsoft Office 2003" /f
reg add "HKLM\SOFTWARE\Microsoft\Windows\CurrentVersion\RunOnceEx\0001" /v "0001" /d "%SystemRoot%\System32\msiexec.exe /passive /i %SystemDrive%\Sources\Office2k7\O12Conv.msi" /f
reg add "HKLM\SOFTWARE\Microsoft\Windows\CurrentVersion\RunOnceEx\0001" /v "0002" /d "%SystemRoot%\System32\msiexec.exe /passive /i %SystemDrive%\Sources\Office2k3\PRO11.msi" /f

reg add "HKLM\SOFTWARE\Microsoft\Windows\CurrentVersion\RunOnceEx\0002" /ve /d "Microsoft FrontPage 2003" /f
reg add "HKLM\SOFTWARE\Microsoft\Windows\CurrentVersion\RunOnceEx\0002" /v "0002" /d "%SystemRoot%\System32\msiexec.exe /passive /i %SystemDrive%\Sources\FrontPage2k3\FP11.msi" /f
More info can be found here: http://support.microsoft.com/kb/310593
Batch Subroutines
Batch subroutines… let’s not kid ourselves. They are not subroutines. The are GOTOs pretending to be subroutines.
Here is how (not) to do a subroutine in batch:
call :Subroutine "Hello" "World"
call :Subroutine "foo" "bar"
goto :EOF

:Subroutine
@echo off
@setlocal enabledelayedexpansion

echo %~1 %~2

goto :EOF
The important bits:
call :Subroutine arg1 arg2 ...: shows how to call the subroutine. Thecallkeyword is important, since it creates a subshell and skips forward to :Subroutine.goto :EOF: this is needed to prevent the subroutine from running after it has been called. Remember: batch scripts do not support real subroutines, and will continue to execute after calling the subroutine! This GOTO causes execution to skip past any subroutine declarations.:Subroutine: this defines the name of the subroutine.echo %~1 %~2: this shows how to use arguments passed to the subroutine.goto :EOF: as before, we need to tell the subroutine to quit. If you want to create any other subroutines, put them below this line. Remember, the subroutine is running in a subshell, so when it quits, the parent shell will continue on the next line.
Advanced example: a batch script which uses subroutine to create RunOnceEx keys:
When you put the two together, you get the following script:
@echo off
set /a KEYNUM=1000
@setlocal enabledelayedexpansion

reg add "HKLM\SOFTWARE\Microsoft\Windows\CurrentVersion\RunOnceEx" /v TITLE /d "Installing Software" /f
call :RunOnceEx "Microsoft Office 2003" "%SystemRoot%\System32\msiexec.exe /passive /i %SystemDrive%\Sources\Office2k7\O12Conv.msi" "%SystemRoot%\System32\msiexec.exe /passive /i %SystemDrive%\Sources\Office2k3\PRO11.msi"
call :RunOnceEx "Microsoft FrontPage 2003" "%SystemRoot%\System32\msiexec.exe /passive /i %SystemDrive%\Sources\FrontPage2k3\FP11.msi"

:: Launch RunOnceEx immediately (uncomment to enable):
REM rundll32.exe iernonce.dll,RunOnceExProcess

goto :EOF

:RunOnceEx
@echo off
set /a KEYNUM=!KEYNUM!+1
@setlocal enabledelayedexpansion

set TITLE=%~1
set /a VALNUM=1000

echo "!KEYNUM!"

set KEY=HKLM\SOFTWARE\Microsoft\Windows\CurrentVersion\RunOnceEx\!KEYNUM!
reg add "!KEY!" /ve /d "!TITLE!" /f

:loop
shift
if "%~1"=="" (
  goto :EOF
)
reg add "!KEY!" /v "!KEYNUM!" /d "%~1" /f
set /a VALNUM=!VALNUM!+1
goto :loop
Update 2013-02-18: added a better description of how RunOnceEx works, a clearer example, and a link to the microsoft support page.